Test Environment
Hosted MySQL and Workbench
In the long-term, the best alternative is to have MySQL installed in your own PC.
Installer for Microsoft Windows
You can download the Installer for Microsoft Windows from this link:
Select the lightweight installer (around 2.3Mb), and click Download. You do not need to create an Oracle account, click on “No thanks, just start my Download” instead.
Open the installer, you will have to provide administration privileges to make changes in your computer. Select the Developer configuration option, that will install both MySQL service and MySQL Workbench in your computer.
Follow the instructions, eventually you will be asked to select the encryption method. Select the “Use Legacy Encryption” method recommended for a test environment. You will also be asked to enter a password for the user root, enter a password for the service. When the installation is completed, you can launch the services control panel app to check whether your service is up and running, just look for “Services” in your language in windows and look for the MySQL service and make sure it is started. You may shut it down when you are not using it.
Installer for Mac OS X
Download the installer for MAC OS from this link:
Follow the installation steps, just as in windows, eventually you will be asked to select the encryption method. Select the “Use Legacy Encryption” method recommended for a test environment. You will also be asked to enter a password for the user root, enter a password for the service.
Once the installation is completed, the service is available in your platform. Note that, if you chose to not start MySQL, you will need to enter launchctl from the command line or start MySQL by clicking “Start” using the MySQL preference pane to start it.
You should install MySQL Workbench as well, using the info in this link:
Once you installed it, as in Windows, create a connection to your local service, making sure it is started! Use the password you set during the installation process and you are ready to go!
Create a connection to a database serer in MySQL Workbench
Now, you can look for and open Workbench in your system. When you open the application for the first time, MySQL will show the Home tab which contains the preconfigured connections. You will need to configure a connection to a database on a new installation. Click on the plus icon besides MySQL connection to add a new connection. You should have a connection to a local server:

By default, the host is set to localhost (as you know, your computer), the port is set to 3306, and the user is set to root. If you have not changed the default settings during the installation, you can leave them as they are. Enter the password you configured during the installation process, and you are good to go!
Basic operations in MySQL Workbench
We will mainly use the Visual SQL editor in workbench. The user manual for MySQL Workbench is available here. We encourgage you to read it, but we will summarize the basic operations here.
Note that as depicted in the following screenshot (from the official docs), the SQL editor is divided into different parts:

The main parts that we will use according to this diagram are:
Navigator Sidebar panel. The Navigator sidebar panel allows us to navigate through the different databases (or schemas) and tables in our database. The database in use is shown in bold. We can drop down the database to see the tables in the database. We can also drop down the tables to check the details (columns, indexes, foreign keys, etc.), and if we right click, we can edit the table or edit the data in the table, by clicking on Select Rows.
SQL Editor. This is the main part of the screen, where we can write our queries. To execute our queries, we need to click on the lightning icon in the top bar, to execute the selected query. We can also use the Ctrl+Enter shortcut in Windows and Linux, or Cmd+Enter in Mac OS X to run the query.
Result Grid. This is the part of the screen where the results of our queries are shown. We can also see the execution time of the query in the bottom bar. The results can be exported to different formats, such as CSV, JSON, XML, etc. by clicking on the Export button in the top bar. We can also edit the results by clicking on the Edit button in the top bar, or add new rows by editing the last (empty) row in the result grid. It is also possible to delete rows by selecting them and clicking on the Delete button in the top bar. Do not forget to click on the Apply button to apply the changes to the database.
Output Panel. This is the part of the screen where the output of the queries is shown. If we have syntax errors in our queries, the error will be shown here. We can also see the execution time of the query in the bottom bar.
File Toolbar. This is the top bar, where we can find the buttons to save our SQL files, or open SQL files in the editor. We can also find the buttons to execute the queries, export the results, edit the results, etc.
Install test databases
Once you have installed MySQL and Workbench, you can install the test databases. You can download the test databases from this folder:
Just download the file with the SQL code you would like to install, open it in workbench using the Open File button in the top bar, and execute the code by clicking on the lightning icon in the top bar. You can also use the Ctrl+Enter shortcut in Windows and Linux, or Cmd+Enter in Mac OS X to run the query as explained before. Before you run the code, read it through and make sure you know what it does.
Alternatively, you can use the Data Import menu. Go to Workbench, and in the Data Import, click on the ‘Import from self-contained file’, select the test database you want to import the data input, and click on Start Import. The following screenshot shows the process for the car_retail database:
Make sure you select the option ‘Dump Structure and Data’ to import the data as well. Once the import is completed, you can check that the database is available in the SCHEMAS tab in the left bar.
Visual Code Extensions
If you are using Visual Code, you can install the following extensions to work with MySQL:
SQLTools: This extension will allow you to manage connections to different databases, and execute queries from your visual code editor.
SQLTools MySQL/MariaDB/TiDB: This extension will allow you to create connections to MySQL databases.
To install them, just open the extensions tab in Visual Code, and search for the extension name. Click on install and you are ready to go!
Create a connection
Once you have installed SQL Tools, you can create a connection to your database. Click on the SQLTools icon in the left bar (probably the last item in the menu), and click on the + icon to create a new connection. Select MySQL as the database type, and enter the connection details. The following screenshot shows the connection details for a local MySQL database:

Docker Playground
The test environment in Docker Playground allows us to experiment with SQL using MySQL an Docker. Docker is becoming the industry standard for containerisation: a Technology that allows to easily and efficiently deploy applications using lightweight virtual machines called containers. In this practice, you will deploy two services (or microservices) in Docker Playground:
A MySQL database service with the test databases in the test database folder.
A web administration interface, adminer.
You will then connect to the web interface of adminer to run your SQL queries. ### Requirements For this environment you need an Internet connection and a Docker hub account. To create a Docker hub account, just go to Docker Hub, and sign up with a valid email address.
Steps
Click on the button below to start the test environment:

Docker Playground will ask for your Docker credentials to login. Once you enter your credentials, playground will be ready to start:
When you click on start, Docker Playground will start building the services for the database and the adminer management frontend. The building process might take a while, so a bit of patience is needed at this stage:
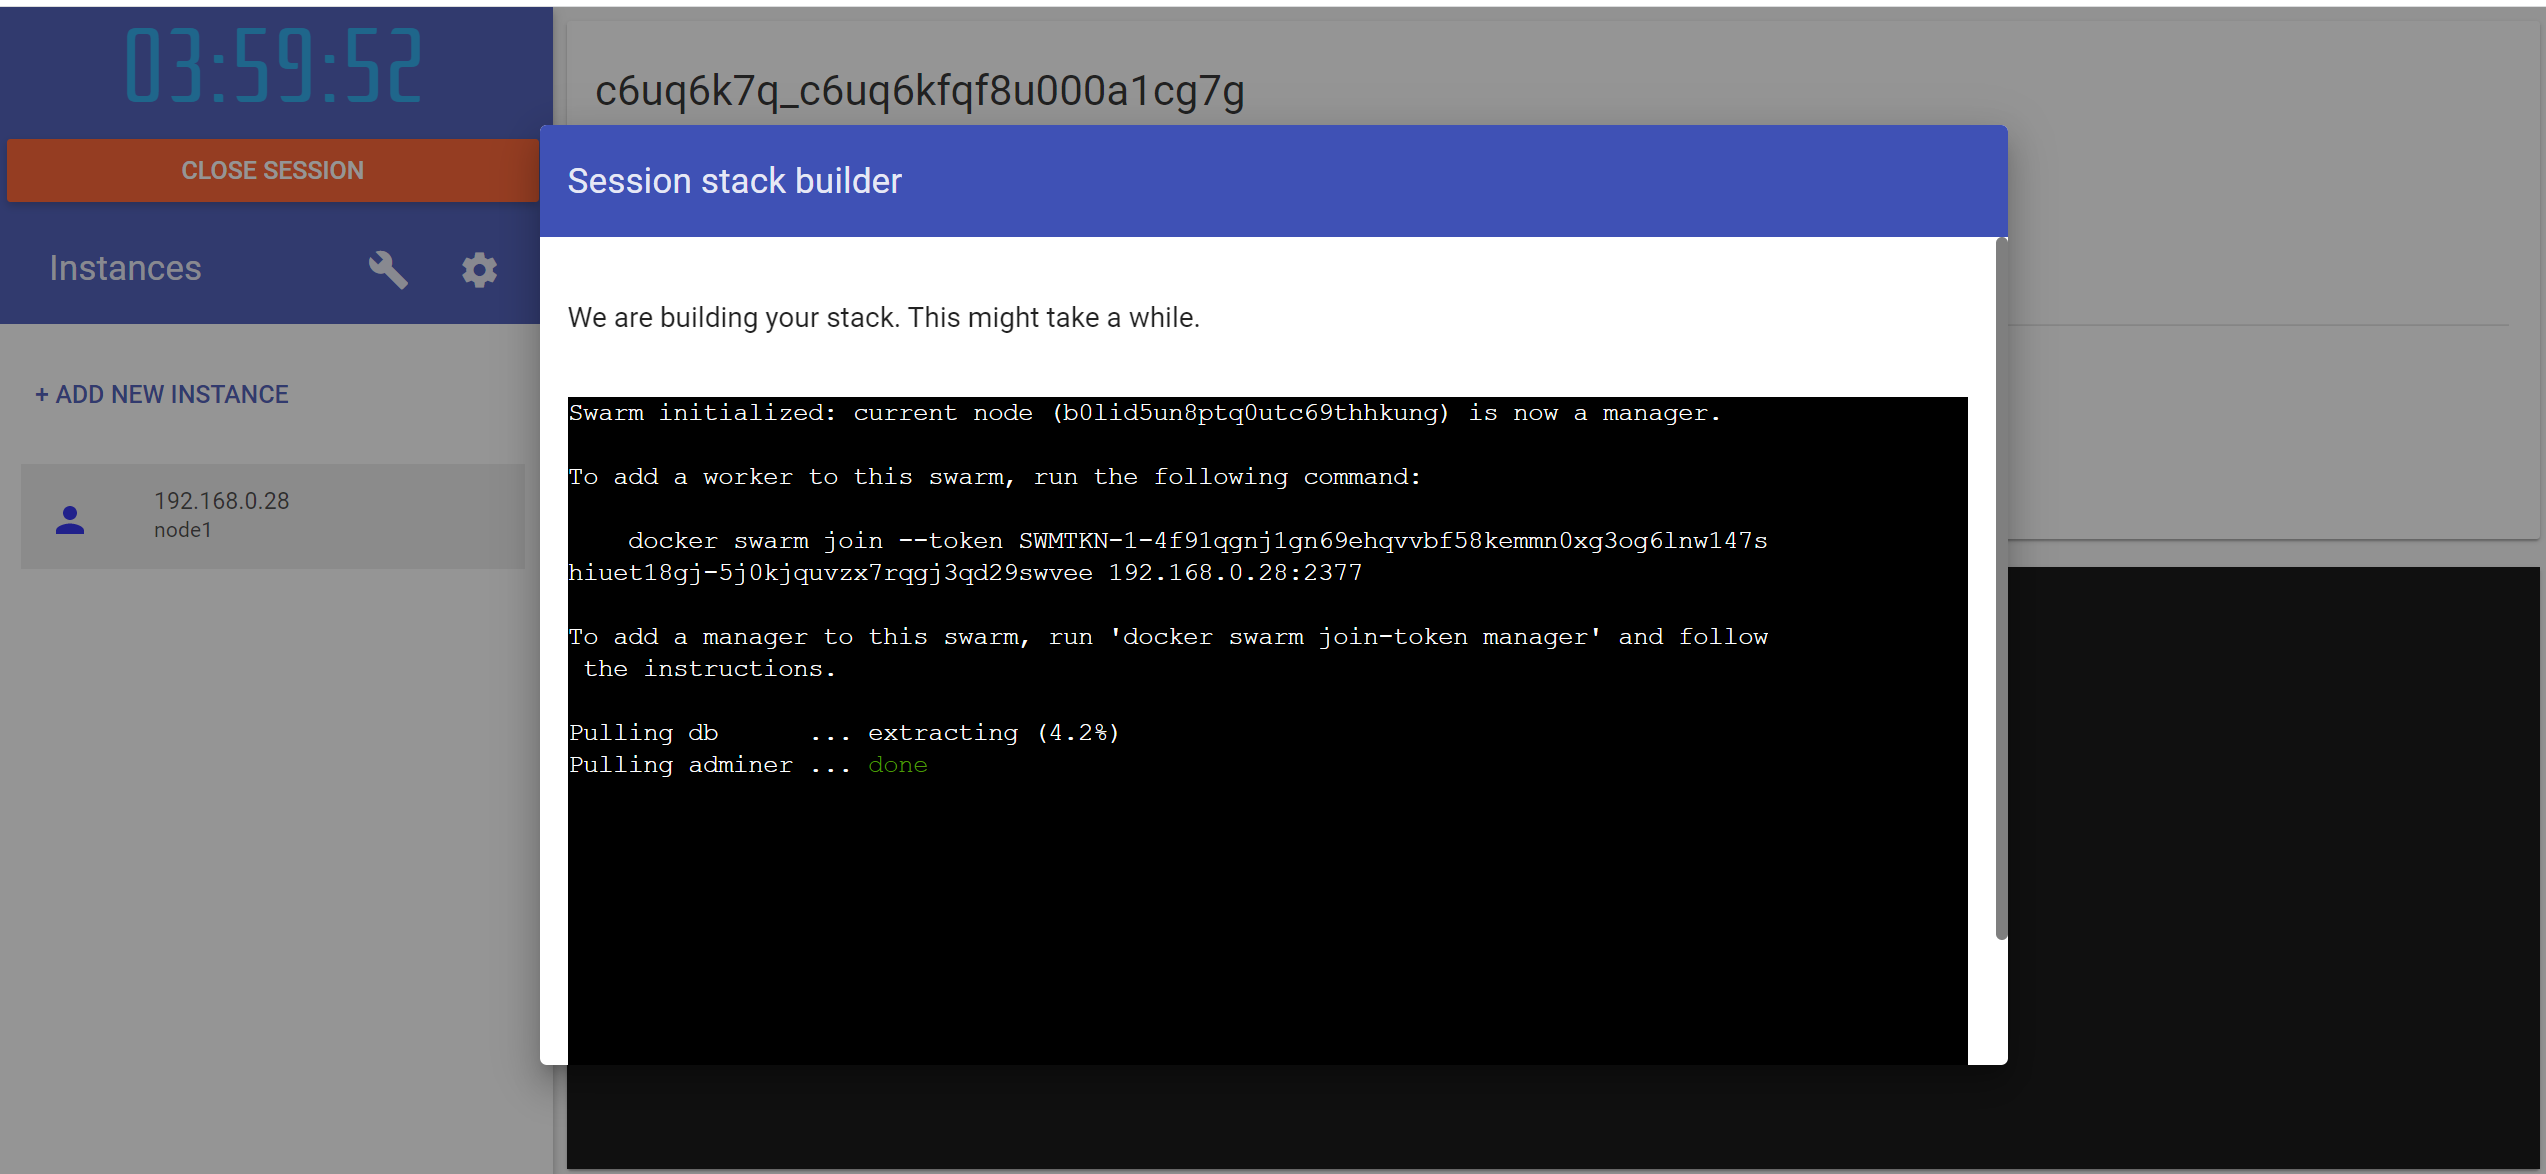
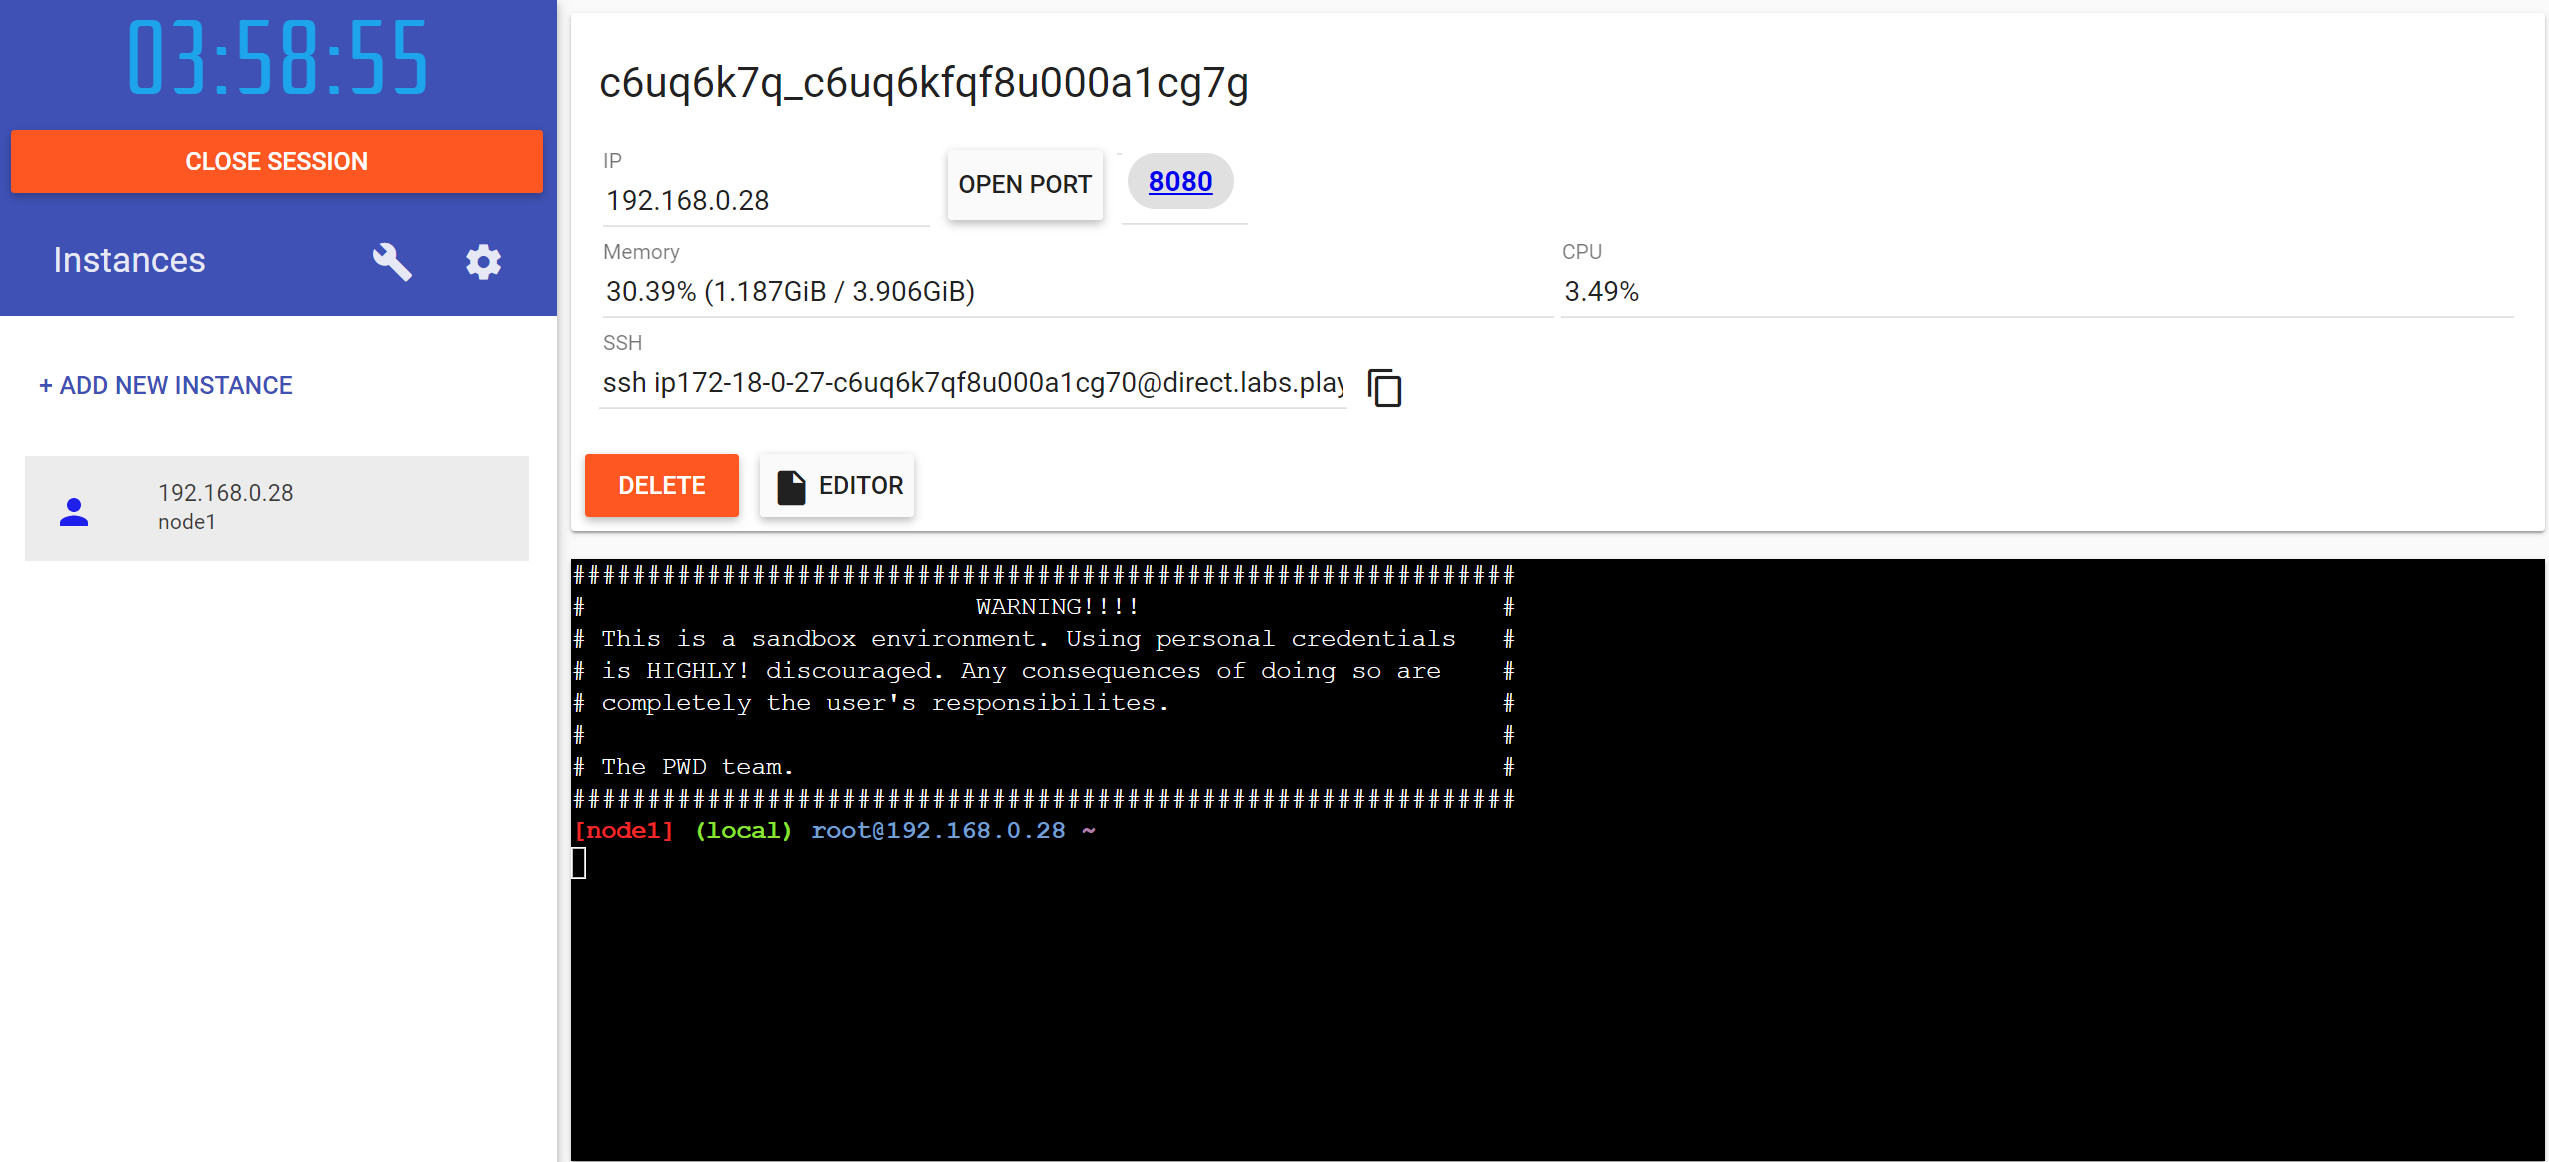
WARNING: When the building is done, a click button will appear. The click button might be a little bit tricky to click, depending on your browser. If you can´t click it, you can just refresh the page and ignore the message. At this point you are able to access your docker environment in PWD. The easiest way to access it is to click on the 8080 link to the adminer frontend:
Once you click on the link, you will access the adminer frontend, where you need to enter the credentials to connect to the MySQL service:
user name: root
password: mysql_is_awesome

Once you are in adminer, you can use its user interface to import the test database files and do the exercises. Just copy the raw contents of the test database you want to load and enter it in the SQL Command input text field:
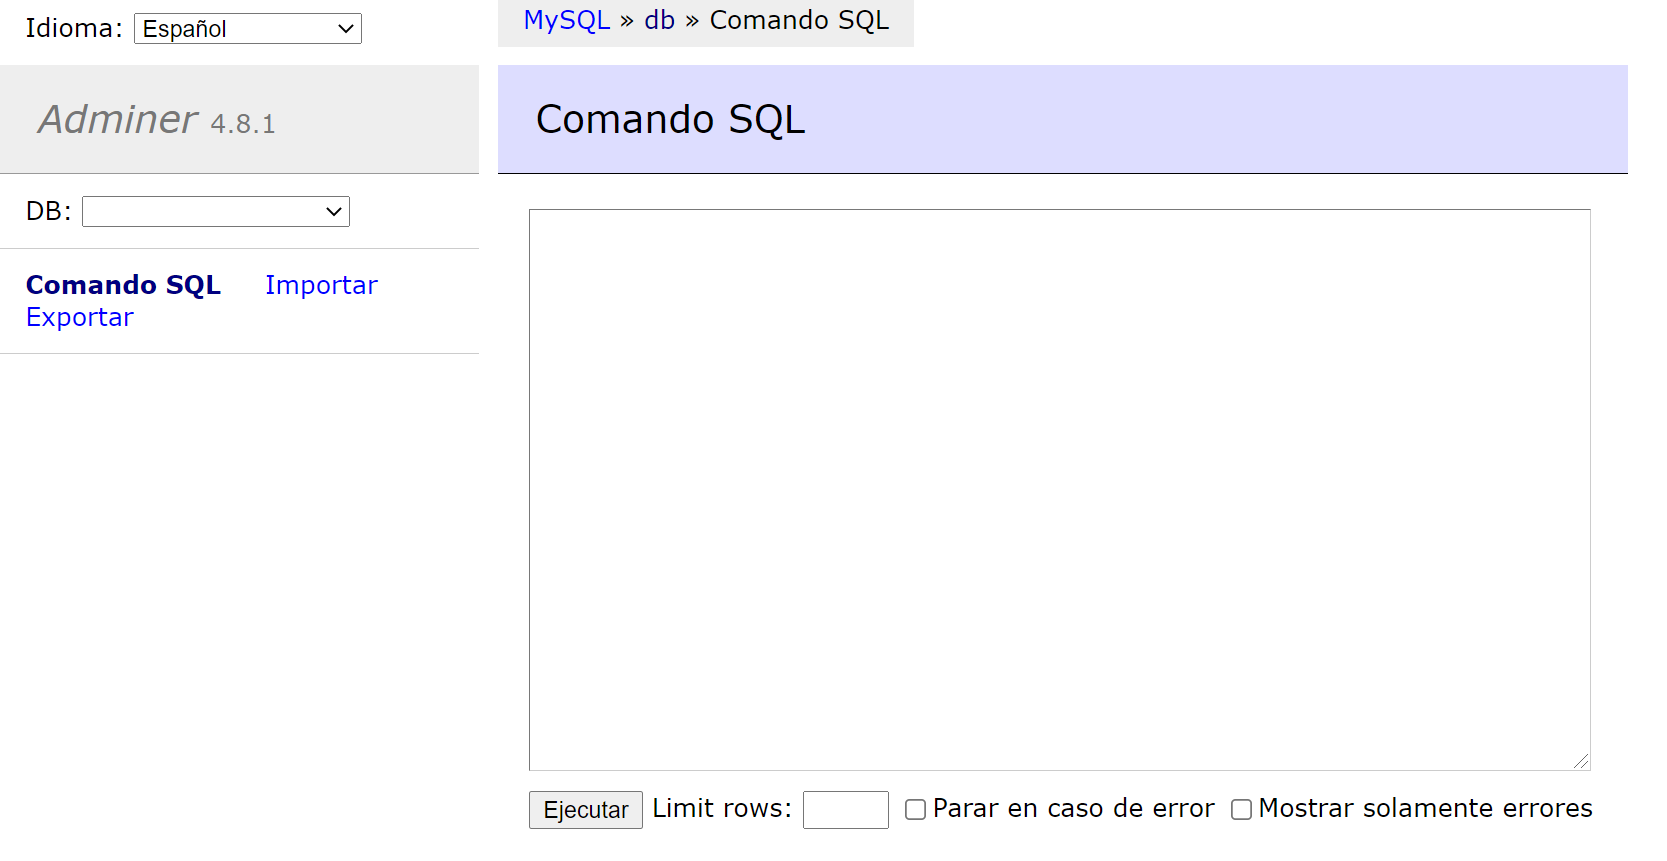
Now, you can select the database, and click on SQL Command to enter again your search query.
Enjoy!
SQL Fiddle
SQL Fiddle is a simple yet powerful environment you can use to set up a test environment for SQL really fast and test your code. ### Requirements No requirements
Steps
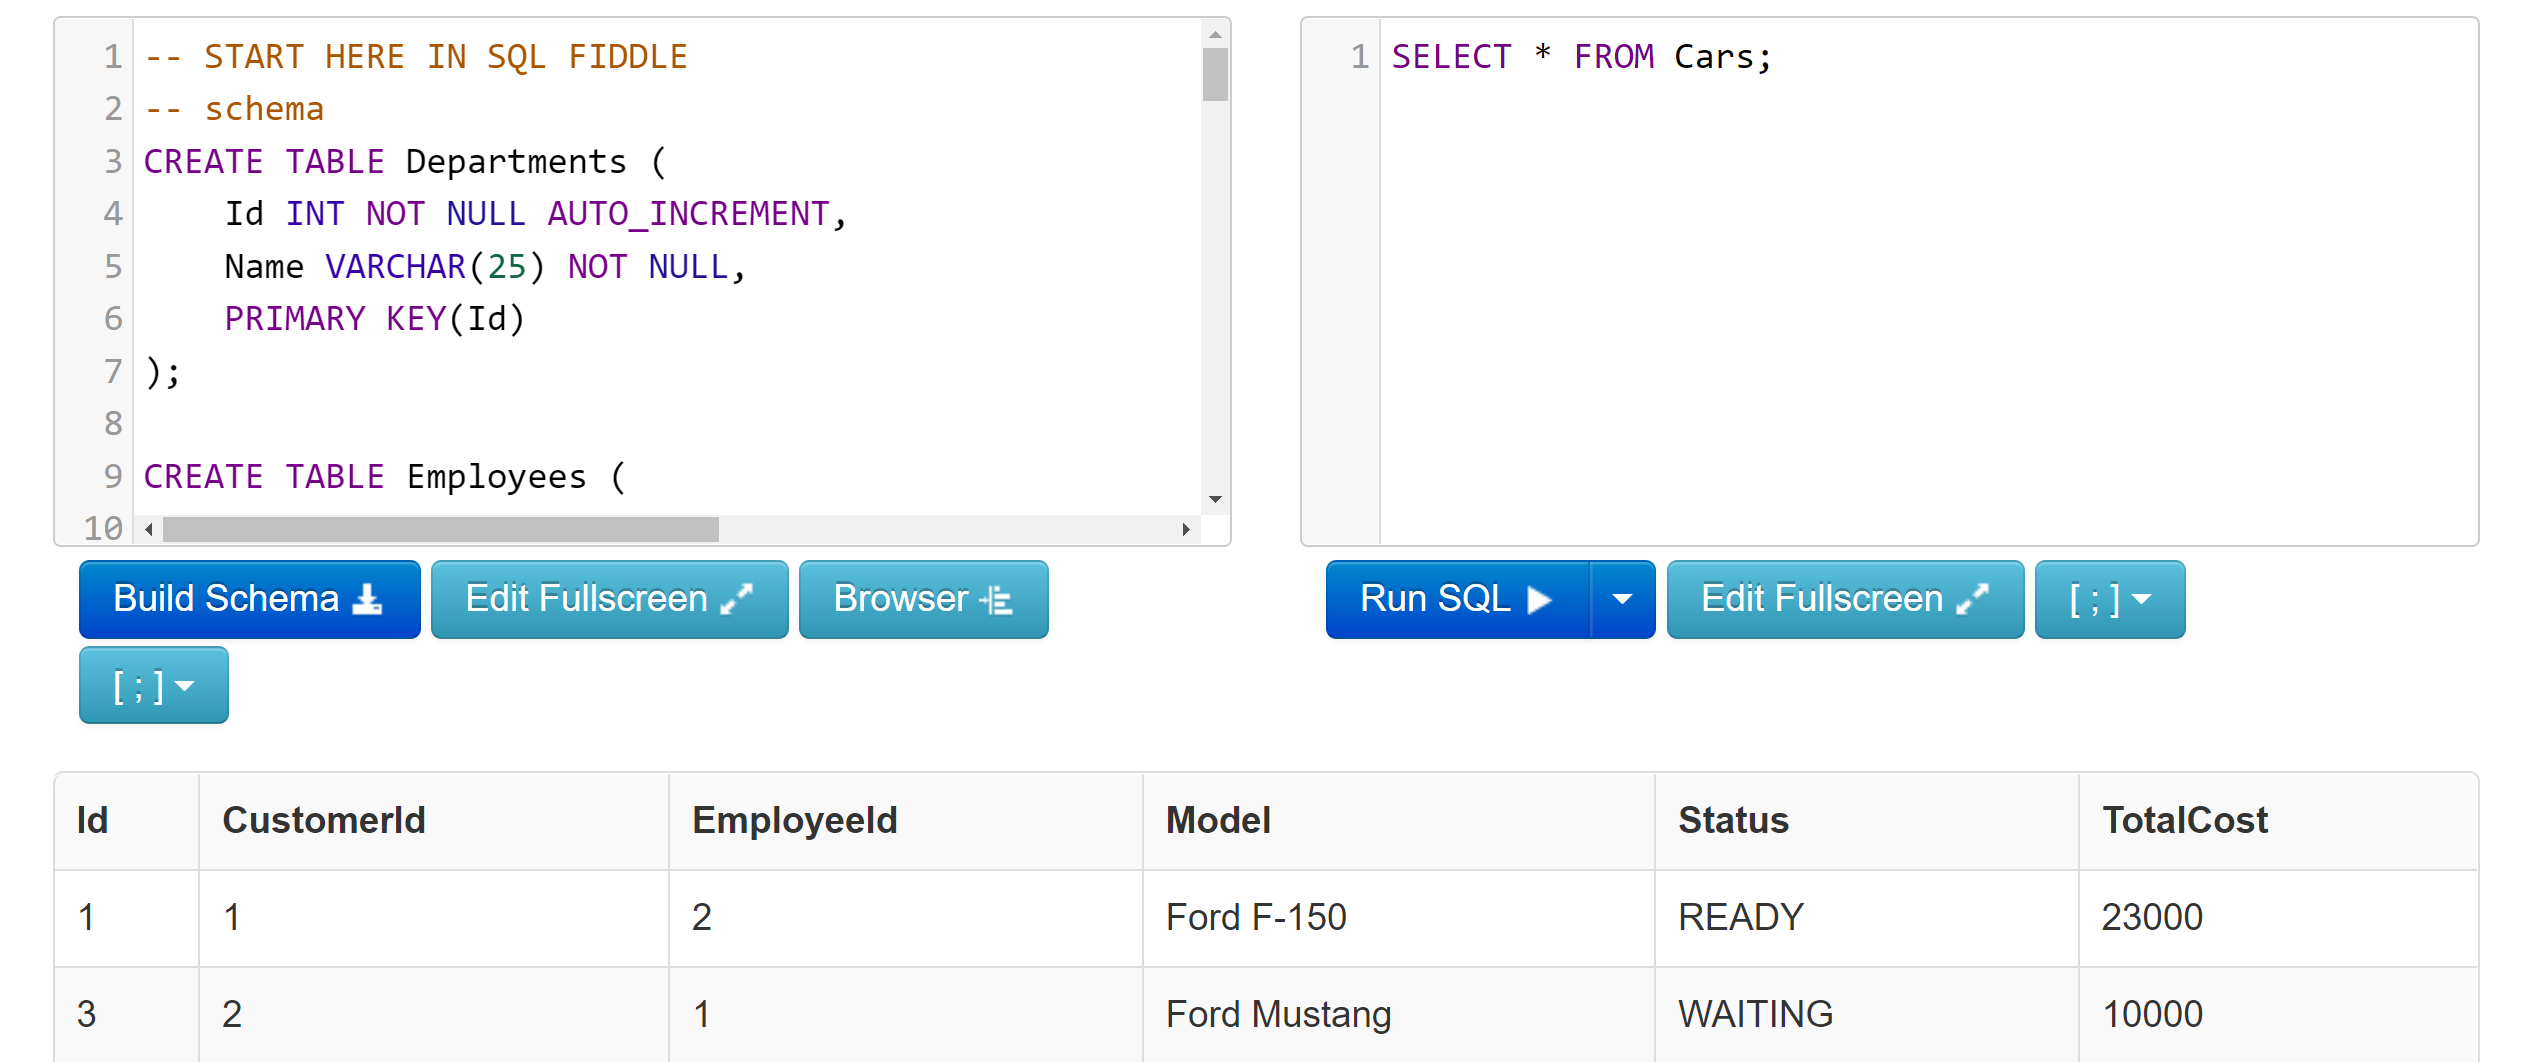
In the web interface, in the panel to the left, you need to enter the CREATE TABLE and INSERT INTO statements to create your tables and insert your rows.
To load a database into this panel, just copy the contents of the SQL file you want to test, paste the content of the file into the left panel and delete the CREATE DATABASE statements. For instance, for the car_retail test database, the page should look something like this:
Now, click on the Build Schema button. The right panel should be now enabled. In this panel you can now enter your search queries and start fiddling with SQL: